
Shoe Design and Manufacturing

By Nadia Brooks
Shoe design and manufacturing begins with a deceptively simple question: how can an idea become a shoe that looks intentional, fits the foot, performs its job and can be made consistently? The answer is not found in a…
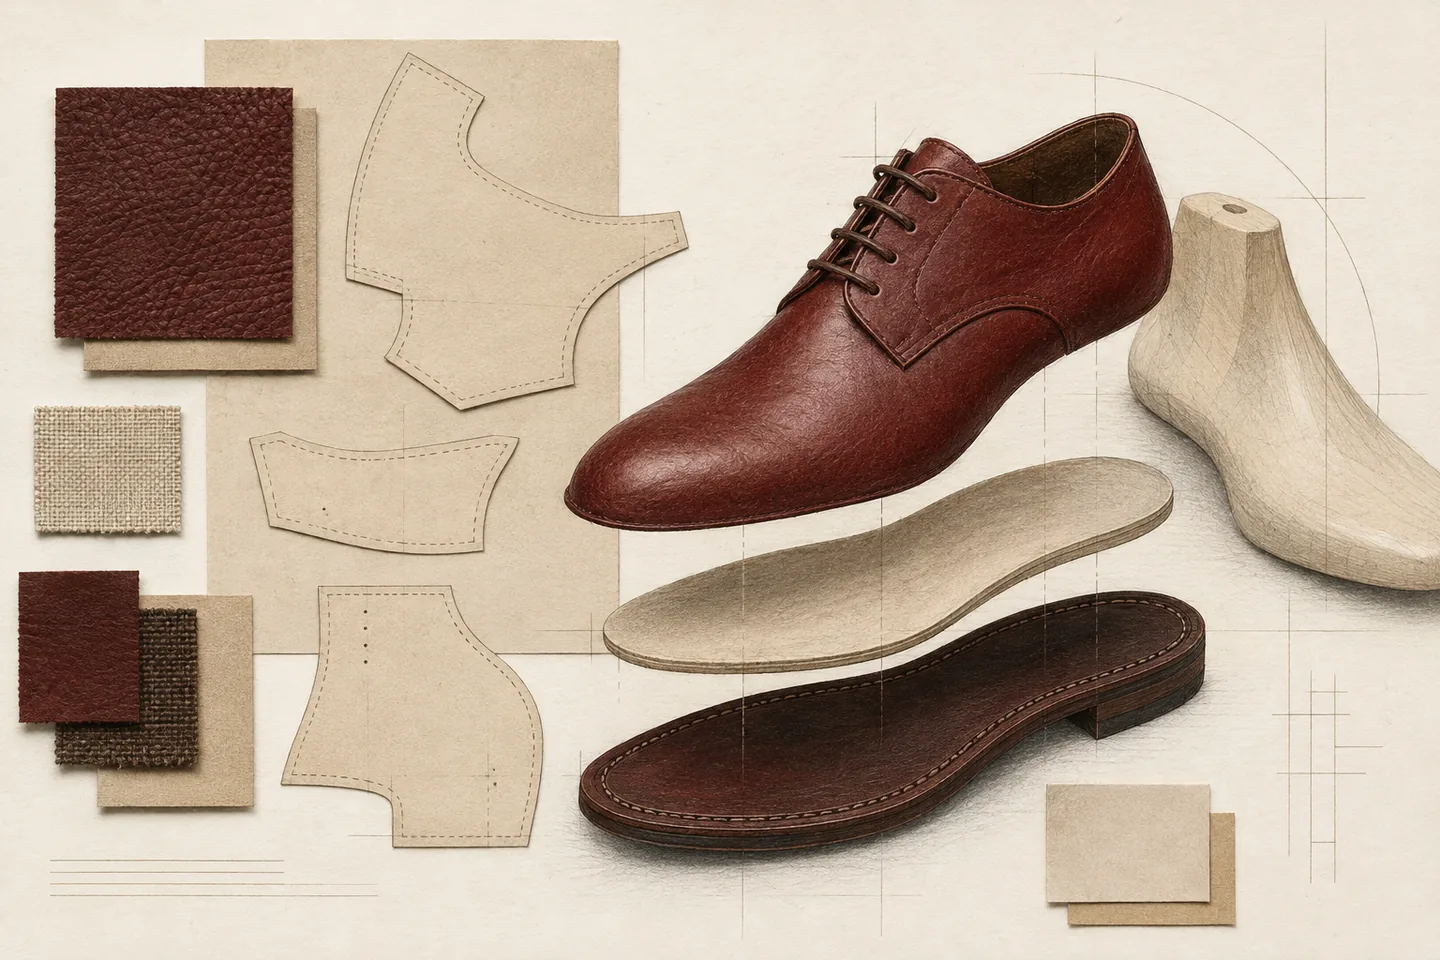
Shoe design and manufacturing begins with a deceptively simple question: how can an idea become a shoe that looks intentional, fits the foot, performs its job and can be made consistently? The answer is not found in a sketch alone. A finished shoe is the result of decisions about purpose, proportion, materials, construction, testing, production and care, all connected by the shape of the last.
Begin with the shoe’s purpose
Define the shoe’s purpose before choosing its appearance. Who will wear it? On what surfaces? In which conditions? For how long at a time? What movement must it support, and what restrictions must it respect?
Purpose establishes priorities. A formal shoe may place emphasis on silhouette, polish and proportion. A hiking shoe may need grip, weather resistance and stable support. A work shoe may require protection from impact, heat, water or chemicals. For protective footwear, the hazards help determine the material and construction (European Agency for Safety and Health at Work).
Write the brief in practical terms. Record the intended activity, the climate, the expected range of motion, the desired level of flexibility, the visual language and the essential performance requirements. Separate necessities from preferences.
The last is where the idea meets the foot
The last is the three-dimensional form around which the shoe is developed. It gives the upper its volume and establishes the relationship between the toe, heel, instep and sole. A drawing can suggest a pointed toe or a generous forefoot, but the last determines how that suggestion behaves when translated into a wearable object.
For this reason, the last should be selected or developed early. A designer working from a standard last may adjust the pattern and upper, but those adjustments have limits. A new last gives greater control, while also creating more development work. In either case, the form should be evaluated on a real foot or an appropriate test form, not only on a screen.
Fit is not a single measurement. It includes space for the toes, hold around the heel, pressure across the instep, flex at the forefoot and contact between the foot and the insole. A visually elegant line that creates pressure or instability is not a successful solution. Comfort should be assessed through wear trials appropriate to the shoe’s intended use, with observations recorded rather than reduced to a vague impression.
Turn the silhouette into a system of parts
Once the form and proportions are established, the shoe must be divided into components that can be cut, prepared, joined and finished. The upper may include a vamp, quarters, tongue, facing, collar, counter and reinforcing elements. Below the foot, there may be an insole, midsole, outsole, heel, shank or other structural pieces.
Patternmaking translates the three-dimensional last into two-dimensional pieces. Each pattern must account for the direction and behaviour of its material, the position of seams, allowances for joining and the movement required during lasting. The pattern is not simply a flat outline of the upper. It is an instruction for how separate pieces will meet around a three-dimensional form.
A technical specification should make the design understandable to another person. It can include drawings of each view, component names, measurements, material descriptions, colour references, seam instructions, logos, hardware, sole details and areas requiring reinforcement. It should also identify tolerances where variation is acceptable. Ambiguity at this stage tends to reappear later as inconsistent samples, avoidable revisions or disagreement between design and production teams.
Choose materials for the whole shoe
Material choice should follow the brief, not replace it. Leather, textiles, coated fabrics, rubber, polyurethane, thermoplastic materials, foams and composite boards each bring different strengths, weaknesses and processing requirements. A material may look convincing in a sample swatch and behave poorly when folded, stretched, stitched, bonded, exposed to moisture or repeatedly flexed.
Assess materials as components in a system. Ask how the upper will move against the lining, how the insole will support the foot, how the sole will grip and flex, and how adhesives, stitches or moulding processes will interact with each surface. Colour, texture and hand feel remain important, but they should sit beside questions of abrasion, tear resistance, bending, dimensional stability, cleanability and repair.
Footwear development connects materials and making with quality control, packaging and later use (SMANSY footwear notes). Environmental decisions are rarely isolated. A component that is difficult to separate may complicate repair or recycling. A durable material may require a process with its own impacts. A simpler construction may reduce the number of material combinations, but only if it still delivers the required performance.
Keep material records clear. Note the supplier’s stated composition, finish, colour, thickness and batch information, but do not treat a description as proof of performance. Where a requirement matters, define a test or inspection method. A responsible specification says what must be demonstrated rather than relying on a broad adjective such as “eco-friendly”, “premium” or “long-lasting”.
Understand the manufacturing sequence
Although factories use different equipment and construction methods, the broad sequence is recognisable. Components are prepared and cut, upper pieces are assembled, the upper is shaped over the last, the sole is attached, and the shoe is finished and inspected. A United States International Trade Commission industry summary describes the basic process as cutting, fitting, lasting, bottoming, finishing, packing and warehousing (U.S. International Trade Commission, Footwear).
Cutting requires attention to grain, stretch, surface defects, pattern direction and material utilisation. Small inconsistencies can become visible when paired components are placed next to each other. In upper preparation, edges may be skived, folded, reinforced, perforated or marked before stitching. The order of operations matters: a seam that is easy to sew before reinforcement may become inaccessible afterward.
Stitching joins the upper into a form that can be lasted. Counters and toe puffs may reinforce the heel and toe, while the lining affects comfort and internal neatness. During lasting, the upper is pulled and secured over the last so that it takes the intended shape. The European Commission’s footwear background report describes the last as a form representing the foot shape and identifies it as an important stage in determining fit and feel (European Commission, Footwear Background Report).
Bottoming connects the upper to the sole. Depending on the design, this may involve adhesive bonding, stitching, moulding, vulcanisation or a combination of methods. Construction affects flexibility, weight, appearance, maintenance and the possibility of repair. There is no universal best method; the appropriate choice is the one that suits the intended use, materials and quality requirements.
Finishing includes trimming, cleaning, polishing, edge treatment, lace or hardware installation, marking and packing. Inspect the pair for consistent shape, colour and finish, including internal seams and loose threads.
Prototype, test and revise
The first sample lets the team inspect fit, balance, proportion, material behaviour, construction and appearance together. Review it systematically. Check the shoe on the last, on the foot and in motion. Compare the sample with the specification. Photograph or record each change so that revisions remain traceable.
Test the properties that matter to the brief. Depending on the category, this may include flexing, abrasion, sole adhesion, slip behaviour, water resistance, seam strength, colour transfer or wear comfort. Testing does not make a claim true by itself; it provides evidence for a defined requirement. For regulated or protective products, identify the applicable legal and technical requirements before production planning begins.
Practical next steps
- Write a one-page brief covering wearer, use, environment, priorities and non-negotiable requirements.
- Choose an existing last or define the changes required to develop one.
- Create a component map and technical specification before requesting samples.
- Shortlist materials by performance, processing, traceability, care and end-of-life considerations.
- Define how fit, appearance, construction and durability will be reviewed.
- Keep a revision record that connects each decision to a sample, measurement or observation.